Class 1/22/2025
Too Faced Shadow Insurance Use this from lashline to brows. When using CUPCAKE to set it, only set the crease up to the brow bone. This leaves the lid tacky and prepped to really hold the shadow on the lid.
Color Fix in Matte Black use this with a fine liner brush, this set is perfect for detail line work, for you wind liner.
Dior Highlighting palette! Founds the one on amazon.
Ambient Lighting Palette for setting the face. Will last forever and its just gorgeous on skin.
Anastasia in Medium Brown Pencil is great or you can use the powder. Brow Powder Duo. Only thing with the powder duo is youll never use the lighter color so the pencil may be better.
Porefessional Primer from Benefit Spackle it in to pores leaving nothing on the surface. Gimme Brow in 4.5.
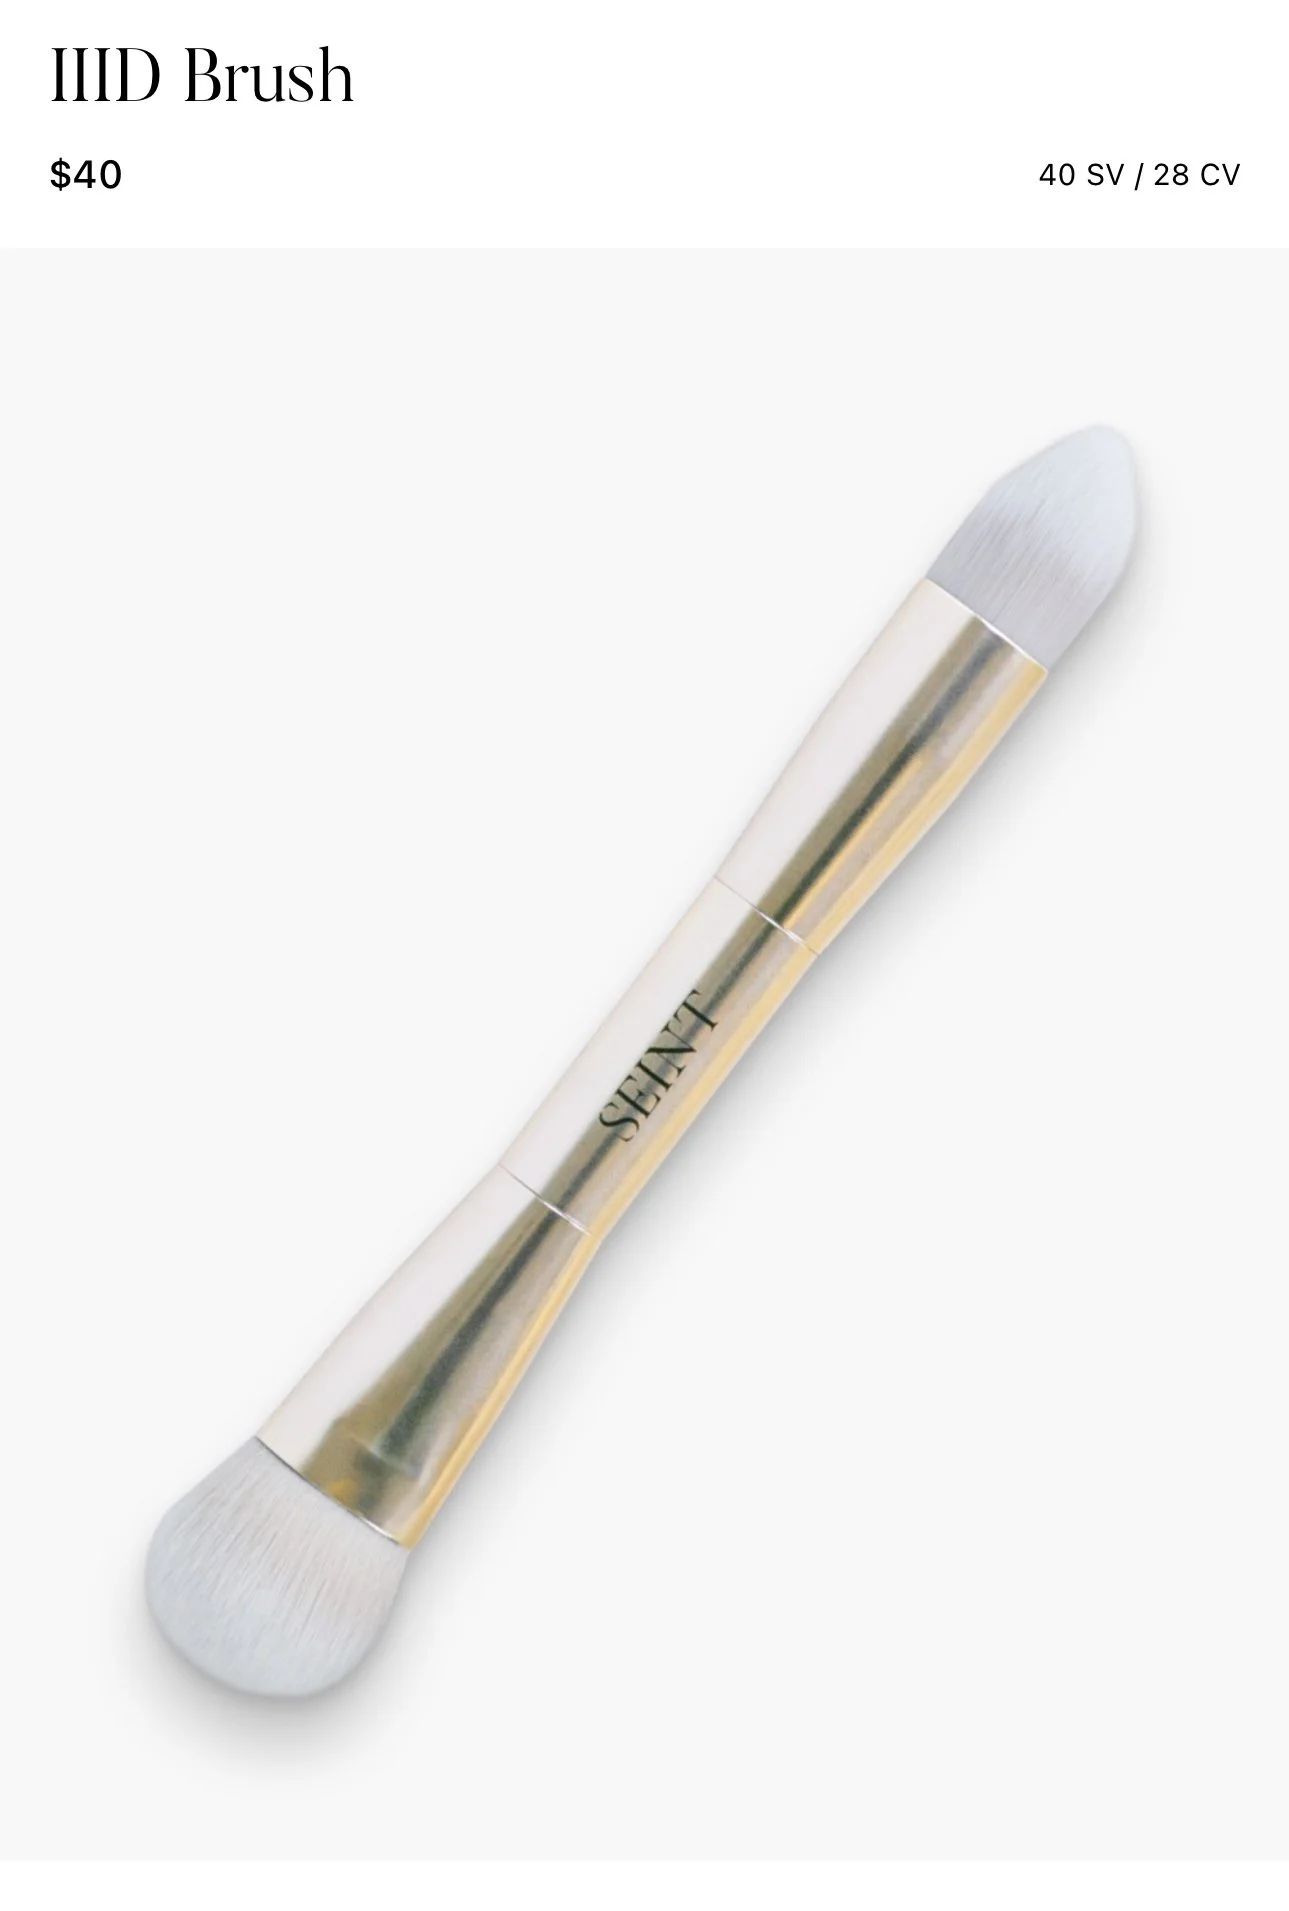
Brushes and 2 eyeshadows are linked in the List on Seint. Click the link to get to it.
SHAPE BRUSH, BLEND BRUSH, CUPCAKE AND VENUS EYESHADOWS, AND SOLID PERFUMES. Perfumes in Number 6, the first you smelled and really loved. The other was Folklore.
VERY IMPORTANT is small pointy qtips to sharpen your wing and detail clean up!
FIRST CLASS NOTES!
Start with asking what look they want to accomplish and ask at he end if you answered all her questions.
Ask about skincare prep. Reinforce importance of exfoliating skin and hydrating it. Start makeup 5 min after putting on moisturizer. Talk about dimethicone, the slippery feel in moisturizer, not being in skin care under the makeup.
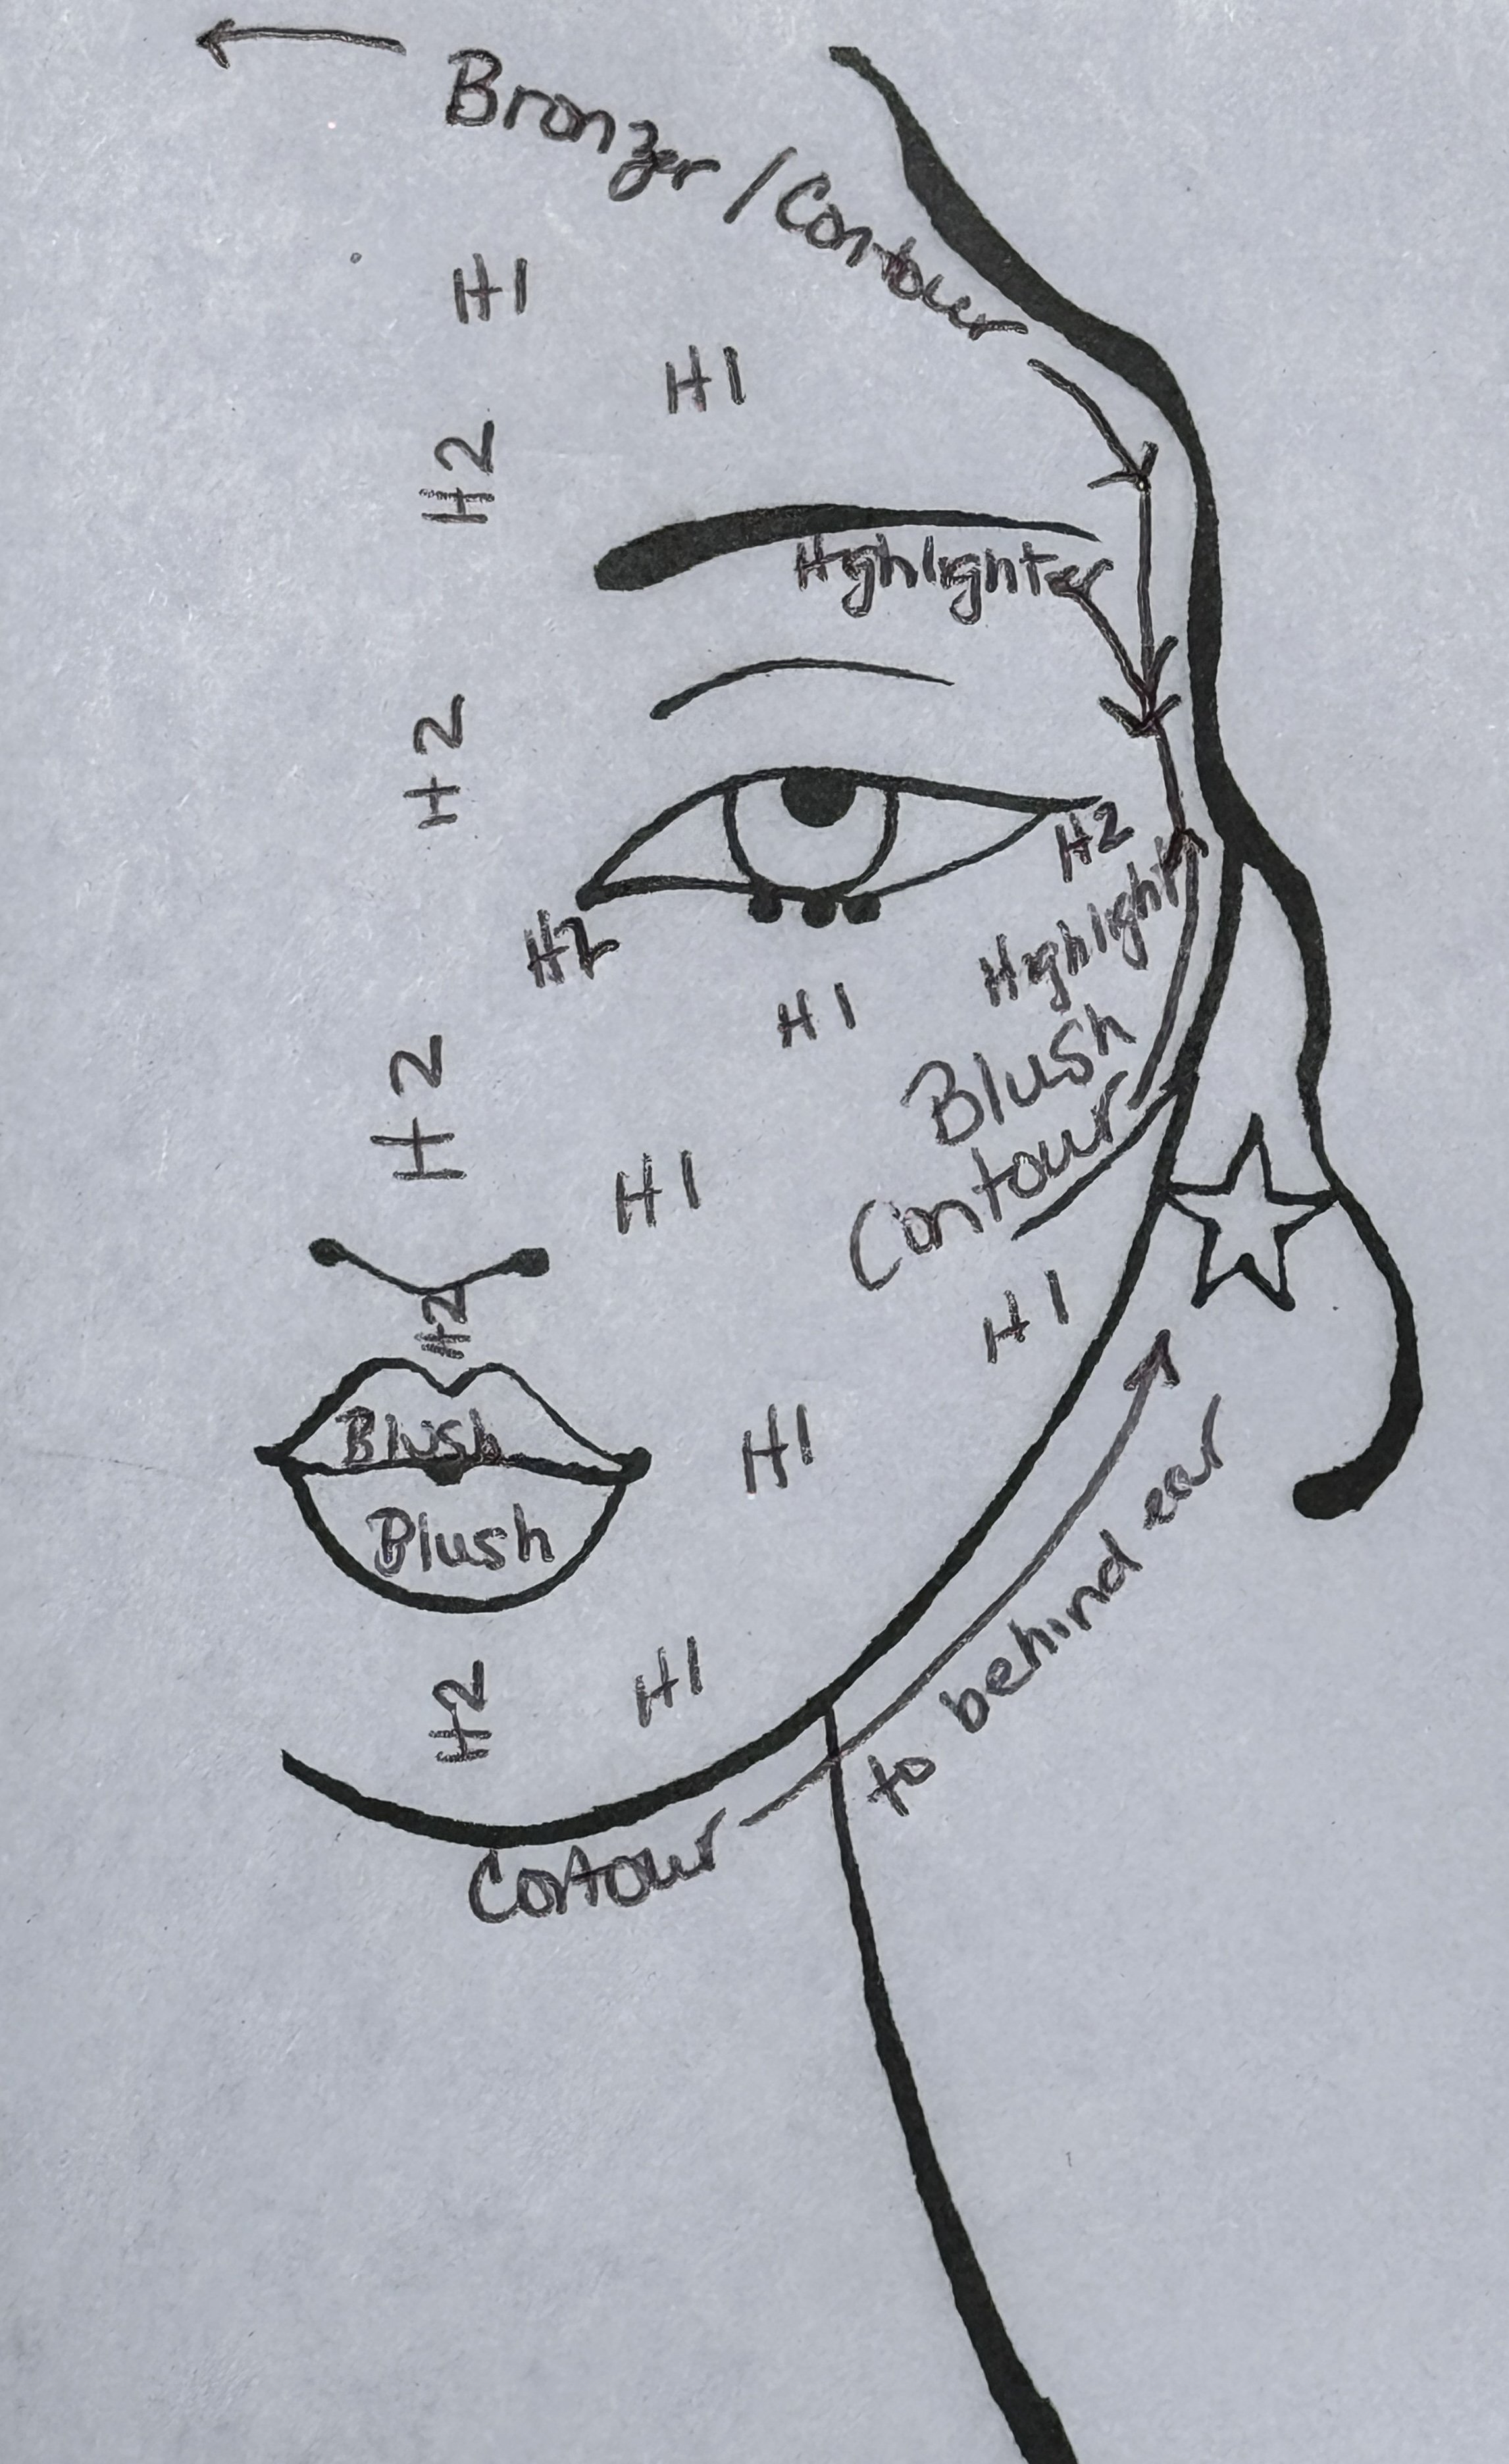
Ask if they want a natural or luminous finish. Luminous will always be flattering on mature skin. If they say yes to luminous, start with the gold or pink cream illuminator against the skin. You do one-half. They mimic and do the other half.
Begin with main Highlight. Do brightening Highlight. Then contour. I blend at this point usually, but don't wait more than a couple minutes to blend. So wherever that happens, even if it's before contour, blend. Letting it sit on the skin too long makes the blending more difficult because it warms on the skin and settles. Can use a setting spray on the face to blend of difficult to blend. (If blending is hard, skin isn't hydrated enough).
Then add blush and cream illuminator. Add the illuminator around the eyes and under the brow. Even put on eyelid to show how pretty it is.
Add cheek color to lip for finish. Add illuminator on top to show another way to use it. Helps to sell it.
If someone has a lot of peach fuzz on their face, it may make blending less pretty. I often discuss Dermaplaning and its benefits at that point.
Tips for client. Place contour above the hollows of cheek to make blending and keeping it from dropping below the hollows and dragging face down.
Show powder illuminators as an option for brightening the face and they're gorgeous on the eyes!
Keep brush suggestions simple. 2 max to keep it from being overwhelming for beginners.
These are my brush suggestions to have on hand for classes so clients can use them and decide which one they like.

Face Brush for precise Contour and Concealer (Brightening Highlight)

My face brush for applying the cream illuminators all over the face and around the eye. Great for concealer. Great for petit features that struggle with big brushes. Perfect for a soft application of blush, bronzer and highlighter.

Personal fav for foundation blending. Smaller than brush and bronzer brush so keeps products where you put the better. Suggest for people wanting a lighter finish for their makeup.
Suggested brush for full face. Gives a full coverage finish so best for people wanting more coverage.
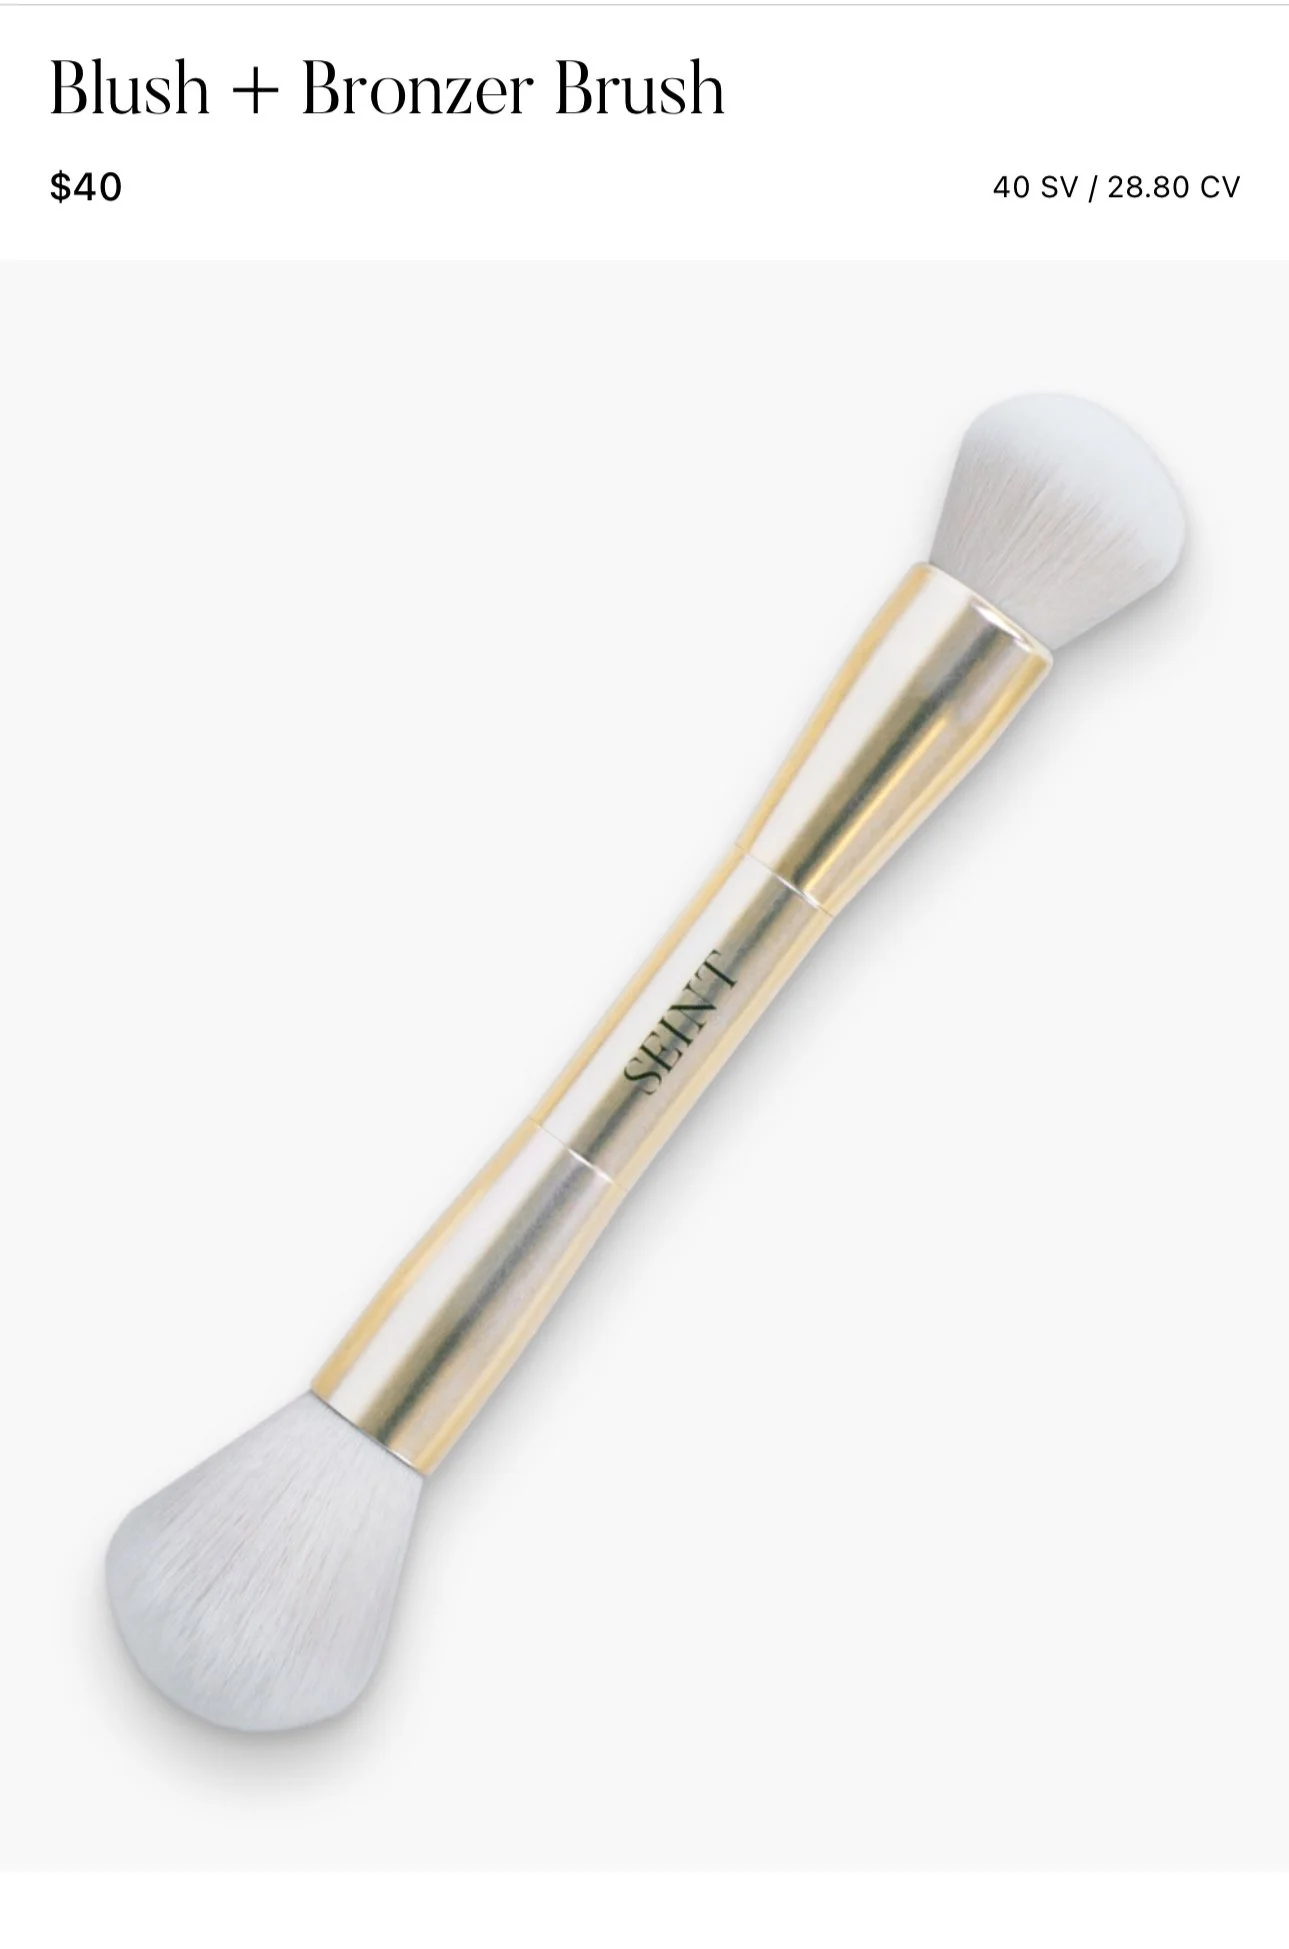
What most people use for the face. Small side works well but bigger side is too big for blending makeup. I suggest the bigger side for setting powder.